
In the blog so far we’ve covered how granite is quarried to be made into all sort of things, including monuments. But once the blank stone is in our shop, how it is made into a personalized monument?
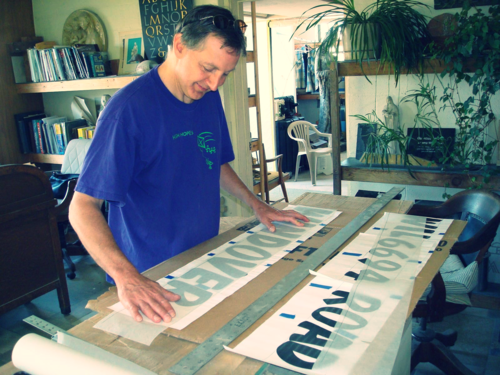
Matt Carpenter lays out a design for a business sign.
1. The design is laid out to include lettering and other design elements.
2. The monument or marker surface is covered with an adhesive-backed rubber cover.
3. The lettering is transferred to the rubber cover using a carbon-backed layout of the design. Semi-transparent tracing paper is usually used for the transfer.

Cutting out the design takes patience and practice.
4. The next step is for someone with patience and a steady hand!
Each letter, design, drawing or line must be cut out from the rubber using a small knife and a straightedge ruler. Any part of the stone uncovered will be engraved. Laser cutters in some cases have automated this process.

This ad for sand blasting equipment is from 1926; the equipment hasn’t changed much since!
5. Sandblasting is the technique most commonly used to engrave stone. It’s done in a completely closed and specially ventilated room.
Small sand particles cut through the exposed areas of stone at a force of 100 psi. The ventilation system collects the sand for reuse. (Note: full personal safety gear is a must for this step!)

See the different colors of the stone? That was achieved by taking the rubber backing off at different times throughout the sandblasting process.
6. After sandblasting, the rubber backing is removed to reveal the engrave design. A concentrated cleaning solution is used to scrub off all the adhesive left by the rubber
7. The monument is ready to be set!
Curious about the stone making process? Check out How Its Made for more information!